Candle tunneling is a common issue for candle lovers. It happens when the wax around the edges of the candle doesn’t melt, forming a tunnel-like hole down the center. Fortunately, with a household item like aluminium foil, you can easily fix this problem and extend the life of your candle.
In this article, we will explain how to fix a tunneling candle using aluminum foil, how to correct a candle sinkhole, and answer other related questions using easy-to-follow steps and simple language.
Specification: Aluminium Foil for Candle Fixing
| Feature | Detail |
|---|---|
| Material | Food-grade aluminum foil |
| Thickness | 10–25 microns |
| Width | 30 cm / 45 cm (standard household) |
| Surface Finish | One shiny side, one dull side |
| Heat Resistance | Up to 660°C |
| Packaging | Roll or pre-cut sheet |
Classification: Common Candle Problems Aluminium Foil Can Fix
Aluminum foil can help with several common candle problems:
- Tunneling: Uneven wax melt that leaves a tunnel down the center.
- Sinkholes: Depressions that form around the wick after cooling.
- Uneven burn: One side melts faster than the other.
- Wax overflow control: Helps prevent wax from spilling.
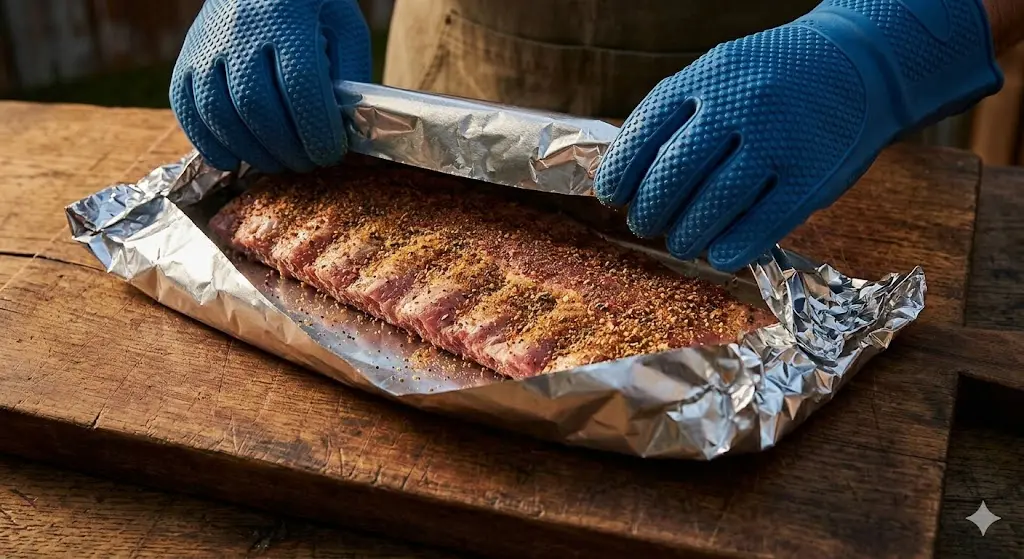
How to Fix Tunneling with Aluminium Foil

Step-by-Step Method

- Wrap the Candle
- Tear a 12-inch foil sheet and loosely cover the candle top.
- Leave a 1-inch opening above the wick for airflow.
- Create a Tent
- Fold edges inward to trap heat and melt outer wax.
- Ensure foil doesn’t touch the flame.
- Let It Burn
- Keep foil on for 1-2 hours until wax evens out.
- Remove foil and trim the wick.
- Prevent Future Tunneling
- First burn: Always burn until wax melts fully to edges (2-4 hours).
- Use a candle warmer for stubborn tunneling.
A Simple Guide to Restoring Your Favorite Candles
There’s nothing quite like the cozy glow and comforting scent of a burning candle. But sometimes, candles don’t burn perfectly.
A common and frustrating problem is “candle tunneling,” where the wick burns down the center, leaving a thick ring of unburnt wax around the edges.
This wastes wax, reduces the candle’s lifespan, and diminishes its scent throw. If you’ve ever wondered, “aluminium foil how to fix candle tunneling,” you’re in luck! This simple household item can be your best friend in reviving a tunneled candle. In this comprehensive guide, we’ll show you exactly how to fix candle tunneling with foil, turning your disappointing burn into a beautiful, even melt.
The Science of Using Aluminium Foil to Fix Tunneling
High Thermal Conductivity

Aluminum is an excellent conductor of heat. Its thermal conductivity rating (k) is approximately 237 W/(m⋅K). This is much higher than glass, ceramic, or wax.
When you place aluminum foil over a candle jar, it absorbs the heat escaping from the rising flame. The foil then distributes this heat evenly back down into the cool, hard wax surrounding the wick.
Exceptional Infrared Heat Reflection
Aluminum foil has a highly reflective surface. It can reflect up to 90% to 95% of radiant infrared heat back toward its source.
By wrapping a sheet of foil around the top of your candle, you build a miniature thermal dome. This dome traps the radiant heat inside the jar, raising the internal air temperature to the melting point of the stubborn wax ring.
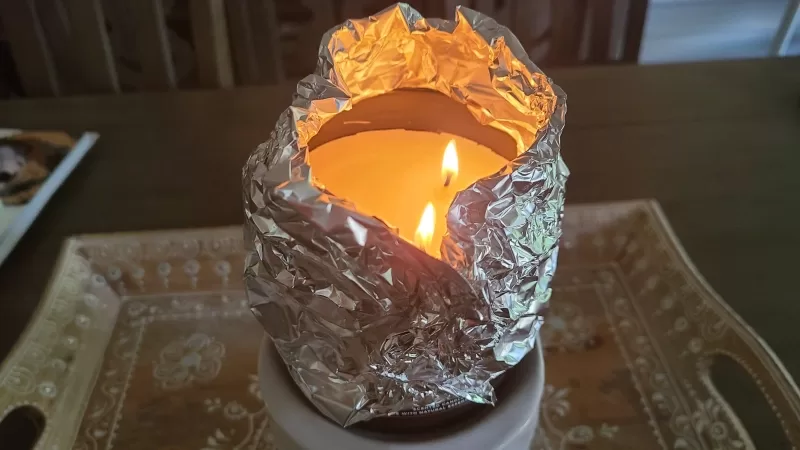
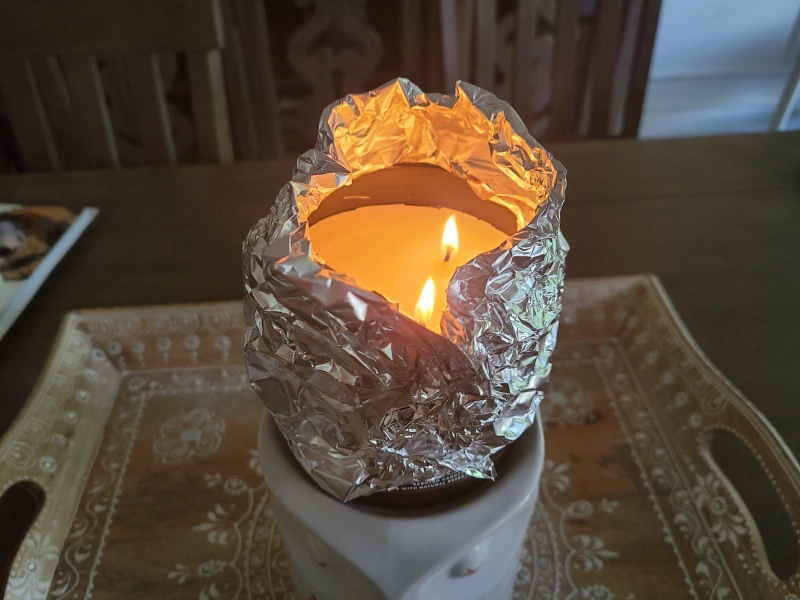
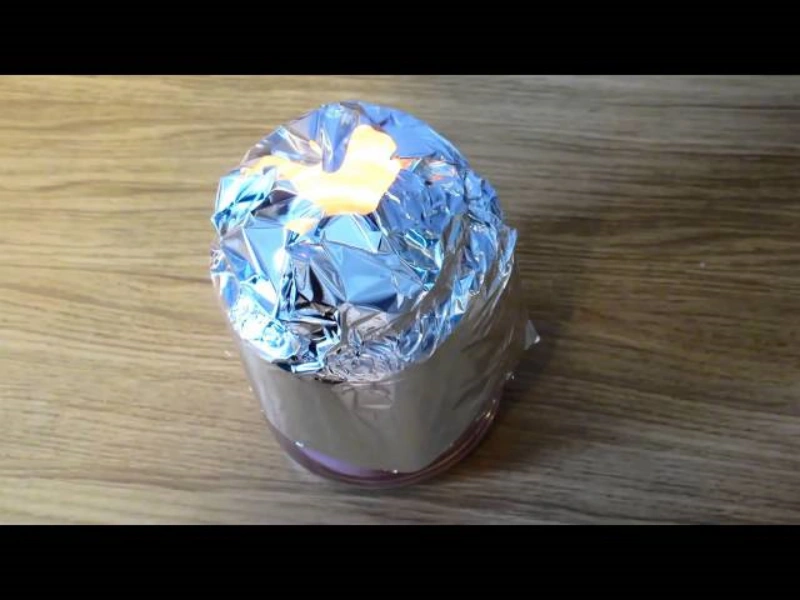
Step-by-Step Guide: The Foil Tent Method
Using aluminum foil to fix a tunneled candle is simple. Follow these steps to melt away the wax ring safely.
Step 1: Measure and Tear the Foil
Tear off a piece of household aluminum foil that is approximately 30 cm to 40 cm long. For best results, use a standard utility-grade foil with a thickness of t=15 microns to t=18 microns.
Step 2: Fold and Wrap the Foil
Fold the sheet of foil in half along its length. This doubling of the sheet increases its thickness (t), which helps it retain and conduct heat more effectively.
Wrap the folded foil around the top edge of your candle jar. Secure it firmly around the glass rim to form a stable metal collar.
Step 3: Create the Dome Shape
Curve the top edges of the foil inward over the opening of the jar. Shape the foil into a small dome or “tent.”
Important: You must leave a circular opening in the center of the dome that is about 2 cm to 3 cm wide. This opening acts as a chimney. It allows fresh oxygen to flow down to the flame and lets combustion gases escape. If you close the dome completely, the flame will choke and go out.
Step 4: Light the Candle and Wait
Carefully light the candle wick through the center opening. Let the candle burn undisturbed in a draft-free room.
Watch the candle closely. Within 30 minutes to 60 minutes, the trapped heat will begin melting the hard wax ring on the sides of the jar.
For deep tunnels, it may take up to 1.5 hours to 2 hours for the wax wall to melt completely into a flat, level liquid pool.
Step 5: Remove the Foil and Trim the Wick
Once the top surface of the wax is completely liquid and flat, carefully extinguish the flame.
Caution: The aluminum foil and the glass jar will be extremely hot. Use oven mitts or tongs to remove the foil dome.
Let the candle cool and solidify completely at room temperature. Before you light it again, make sure to trim the wick to a length of 6 mm to prevent soot buildup.
Technical Specifications of Aluminium Foil
Not all aluminum foils are manufactured the same way. The foils you find in kitchens or industrial warehouses are classified by their alloy composition, temper state, and thickness.
Understanding these specifications will help you select the best foil for heat-retention applications.
Common Aluminum Alloy Grades for Foil
Aluminum foil is manufactured using high-purity aluminum alloys. The most common alloys are listed below:
- Alloy 8011: This is the standard alloy used for household kitchen foil. It contains small amounts of iron (Fe) and silicon (Si). These elements increase its tensile strength and puncture resistance. It is highly formable and handles temperatures up to 300∘C without degrading.
- Alloy 1235: This alloy contains a minimum of 99.35% pure aluminum. It is highly flexible and has excellent electrical and thermal conductivity. It is commonly used for industrial lamination, tobacco packaging, and capacitor manufacturing.
- Alloy 8079: This alloy is designed for high-ductility applications. It offers high tensile strength and excellent moisture-barrier properties, making it popular for pharmaceutical blister packs and food laminates.
Foil Tempers and Hardness States
The temper of aluminum foil determines how stiff or flexible it is.
- O Temper (Fully Annealed): This is the softest state for aluminum foil. Annealing involves heating the metal to a high temperature and cooling it slowly. This process relieves internal stresses, making the foil incredibly soft, highly pliable, and easy to fold around objects like candle jars. Almost all household foils are supplied in the Soft O Temper.
- H22 Temper (Work Hardened and Partially Annealed): This temper offers medium hardness. It is stiffer than O temper and resists tearing. It is often used for semi-rigid aluminum foil food containers and baking cups.
- H18 Temper (Fully Work Hardened): This is a very stiff, hard-temper foil. It does not bend easily and will spring back to its original shape. It is typically used for pharmaceutical push-through packaging and heavy-duty industrial shielding.
Alloy Composition and Material Data
The table below details the chemical composition of the primary aluminum alloys used to produce foils.
| Alloy Grade | Aluminum (Al) % | Silicon (Si) % | Iron (Fe) % | Copper (Cu) % | Manganese (Mn) % |
|---|---|---|---|---|---|
| Alloy 8011 | 97.3%−98.9% | 0.5%−0.9% | 0.6%−1.0% | ≤0.10% | ≤0.20% |
| Alloy 1235 | ≥99.35% | ≤0.65% (Combined) | ≤0.65% (Combined) | ≤0.05% | ≤0.05% |
| Alloy 8079 | 98.0%−98.6% | 0.05%−0.30% | 0.7%−1.3% | ≤0.05% | — |
Thickness Classifications of Aluminium Foil
The thickness of aluminum foil is represented by the variable t. It is usually measured in microns (μm) or gauge units.
Choosing the right thickness affects how much heat the foil can reflect and how well it holds its shape.
Light-Duty Foil
This foil has a thickness range of t=8 \mum to t=12 \mum.
It is very thin and highly economical. However, it tears easily and does not hold its shape well when folded over a wide candle jar opening. It is primarily used for light food wrapping and laminating.
Standard-Duty Foil
This foil has a thickness range of t=13 \mum to t=18 \mum.
This is the standard thickness for household kitchen foil. It offers a good balance of strength and flexibility. It is easy to mold into a secure dome over a candle jar and holds its shape throughout the heating process.
Heavy-Duty Foil
This foil has a thickness range of t=19 \mum to t=24 \mum.
Heavy-duty foil is highly puncture-resistant and rigid. It provides superior heat retention because the thicker metal barrier slows down convective heat loss. It is excellent for wrapping large, wide-mouth jar candles.
Extra Heavy-Duty Foil
This foil has a thickness range of t=25 \mum to t=50 \mum or more.
This grade is used in commercial kitchens, industrial insulation, and specialty packaging. It is very stiff and behaves more like a thin sheet of metal than a flexible wrap.
Foil Thickness and Thermal Properties Summary
| Foil Class | Thickness (t) | Pliability Class | Heat Retention Level | Ideal Household Use |
|---|---|---|---|---|
| Light-Duty | 8 \mum−12 \mum | Very High (Soft) | Low | Wrapping sandwiches, light baking |
| Standard-Duty | 13 \mum−18 \mum | High | Medium | Standard kitchen cooking, candle tenting |
| Heavy-Duty | 19 \mum−24 \mum | Moderate | High | Grilling, baking heavy meats, wide jars |
| Extra Heavy-Duty | 25 \mum−50 \mum | Low (Stiff) | Extremely High | Industrial insulation, heavy commercial ovens |
Types of Aluminium Foil Products
Manufacturers produce aluminum foil in several formats to meet different consumer and industrial needs.
Standard Household Foil Rolls
This is the classic roll of foil found in almost every home. It typically features Alloy 8011 in a soft O temper, with a thickness of approximately t=15 \mum.
It is packaged in a cardboard box with a built-in metal cutting edge, allowing users to tear custom lengths easily. It is highly versatile and is the most common tool used for fixing tunneled candles.
Pre-Cut Pop-Up Sheets
These are individual sheets of foil that are pre-cut to standard sizes, such as 220 mm×270 mm or 300 mm×300 mm.
They are folded and packed in a pop-up dispenser box, similar to tissues. These sheets save time because you do not have to tear them from a roll. They are highly popular in commercial kitchens and hair salons.
Colored and Printed Foils
These foils feature a decorative colored lacquer or printed design on one side. The opposite side retains its shiny, natural metallic silver finish.
They are commonly used for wrapping chocolates, holiday candies, and premium craft items. If you use colored foil to fix your candle, ensure the natural, unpainted silver side faces inward toward the flame to maximize heat reflection.
Adhesive Foil Tapes
This product consists of an aluminum foil backing coated with a strong, heat-resistant acrylic adhesive.
It is designed for sealing air ducts, joints, and thermal insulation panels. It is highly durable and resists moisture and UV light. However, you should never use adhesive foil tape directly on candle jars. The high heat of the candle can cause the adhesive layer to burn, smoke, and release unpleasant chemical fumes.
Comparisons of Foil and Candle Maintenance Materials
To help you understand the performance of different materials, we have created side-by-side comparison tables.
Alloy 8011 vs. Alloy 1235 Foil
| Feature | Alloy 8011 (Household) | Alloy 1235 (Industrial) |
|---|---|---|
| Aluminum Purity | 97.3%−98.9% | ≥99.35% |
| Tensile Strength | High (120−150 MPa) | Moderate (80−110 MPa) |
| Flexibility | Good | Excellent (Very soft) |
| Tear Resistance | High | Moderate |
| Best Use | Household cooking, candle care | Electronics, industrial laminations |
Wax Types and Their Melting Behaviors
Different candle waxes respond differently to the heat trapped by an aluminum foil dome.
- Paraffin Wax: This petroleum-derived wax has a relatively low melting point of 46∘C to 57∘C. It melts quickly under a foil dome, usually within 30 minutes.
- Soy Wax: This natural vegetable wax has a melting point of 49∘C to 54∘C. It melts easily, but its natural composition requires a slow, even heating cycle to prevent cracking.
- Beeswax: This premium natural wax has a high melting point of 62∘C to 64∘C. Because it requires significant heat, you must use heavy-duty foil (t≥20 \mum) to trap enough energy to melt a beeswax tunnel.
| Wax Type | Average Melting Point | Heat Requirement | Melting Speed under Foil Dome |
|---|---|---|---|
| Paraffin Wax | 46∘C−57∘C | Low | Fast (30−45 minutes) |
| Soy Wax | 49∘C−54∘C | Low to Medium | Moderate (45−60 minutes) |
| Coconut Wax | 38∘C−45∘C | Very Low | Extremely Fast (20−30 minutes) |
| Beeswax | 62∘C−64∘C | High | Slow (60−90 minutes) |
Wider Applications of Aluminum Foil
Aluminum foil is highly versatile. Its heat-retention, moisture-barrier, and reflective properties make it useful across many industries:
- Culinary and Food Packaging: Wrapping foods for roasting, lining baking pans to prevent sticking, and sealing leftovers to retain freshness.
- Industrial Thermal Insulation: Backing fiberglass insulation blankets, wrapping steam pipes to prevent heat loss, and lining radiant heat barriers in attics.
- Electrical Shielding: Wrapping communication cables to prevent electromagnetic interference (EMI) and protecting sensitive electronic components.
- Pharmaceutical Packaging: Creating moisture-proof blister packs, sealing medicine bottles, and packaging sterile medical devices.
- Cosmetic and Hair Styling: Wrapping hair sections during high-light bleaching treatments to accelerate chemical reactions through trapped body heat.
- Laboratory Experiments: Sealing test tubes, lining sterile countertops, and wrapping heat-sensitive samples during storage.
What is Candle Tunneling?
Before we dive into the fix, let’s understand the problem. Candle tunneling occurs when a candle’s wick burns straight down, creating a narrow “tunnel” in the center of the wax, leaving a significant amount of wax around the sides of the container untouched. This happens because:
- First Burn Syndrome (Wax Memory): The most common cause. Candles have a “wax memory.” On the very first burn, you need to let the candle burn long enough for the entire top layer of wax to melt evenly to the edges of the container. If you extinguish it before this happens, the candle will “remember” that smaller melt pool for future burns, leading to tunneling.
- Short Burn Times: Consistently burning a candle for short periods (less than 2-3 hours) also prevents the melt pool from reaching the edges, reinforcing the tunneling.
- Too Small a Wick: If the wick isn’t appropriately sized for the candle’s diameter, it won’t generate enough heat to melt the entire surface.
- Drafty Areas: Burning a candle in a drafty spot can cause one side to burn faster than the other, contributing to an uneven melt and eventual tunneling.
Tunneling isn’t just an aesthetic issue; it means you’re not getting the most out of your candle’s fragrance or its burn time, effectively wasting wax. That’s why knowing how to fix a tunneling candle with foil is such a valuable trick.
Why Aluminium Foil is the Solution
The reason aluminium foil works so effectively to fix candle tunneling lies in its ability to trap and reflect heat. When you wrap foil around the candle, you create a kind of “mini-oven” effect. The trapped heat melts the hard, unburnt wax on the sides, allowing it to join the main melt pool. This essentially “resets” the wax memory and allows the candle to burn evenly across its surface. It’s a surprisingly simple yet incredibly effective method to reverse candle tunneling.
How to Fix Candle Tunneling with Foil: Step-by-Step Guide
This method is straightforward and doesn’t require any special tools beyond a roll of aluminium foil. Here’s how to fix a tunneling candle with foil:
- Prepare Your Candle: Before you begin, make sure your candle is on a heat-safe surface. If the wick is very short or covered by wax, you might need to carefully expose it a bit. You can gently scrape away some wax around the wick to give it room to breathe, or if the wick is truly buried, use a lighter or a long match to try and melt a small amount of wax around it to get it started.
- Create the Foil Collar/Dome:
- Take a piece of aluminium foil large enough to wrap around the top of your candle.
- Fold the foil to create a collar that extends slightly above the height of the unburnt wax edges.
- Wrap this foil collar around the top rim of your candle, making sure it fits snugly but doesn’t completely block the flame from receiving air.
- You want to create a small “dome” or “tent” over the top of the candle, with an opening in the center for the flame to breathe. The key is that the foil should reflect the heat back inwards towards the edges of the wax.
- Light Your Candle: Light the candle’s wick as usual.
- Monitor the Melt Pool: Let the candle burn for a few hours. The heat trapped by the foil will slowly melt the built-up wax on the sides of the container. You’ll see the unburnt wax gradually melt down and join the main melt pool.
- Important: Keep an eye on the candle. The goal is for the entire top surface of the wax to become a liquid pool, reaching all the way to the edges of the container. This can take anywhere from 1 to 4 hours, depending on the size of the candle and how severe the tunneling is.
- Remove the Foil: Once the entire top layer of wax has melted to the edges, carefully extinguish the flame. Allow the candle to cool completely before removing the foil. The wax should now be level across the surface.
This process directly addresses the question, “how do you fix a tunneling candle with foil?” by creating the perfect environment for an even melt.
Can You Reverse Candle Tunneling?
Absolutely! As demonstrated by the aluminium foil method, you can reverse candle tunneling. The wax memory that caused the tunneling can be effectively “overwritten” by forcing an even, full melt pool. Once the wax has melted all the way to the edges and solidified flat, your candle’s “memory” will be reset. From that point on, if you follow good candle care practices (discussed below), your candle should continue to burn evenly. It’s a true salvage operation for your favorite scents!
How to Fix a Candle Sinkhole with Aluminum Foil?
While similar to tunneling, a “sinkhole” or “crater” in a candle often refers to a depression that forms after a full burn, typically due to air pockets or uneven cooling during manufacturing, or sometimes after an initial uneven burn. If you have a sinkhole, aluminium foil can also be helpful:
- Expose the Wick (if needed): If the sinkhole has swallowed the wick, gently dig around to expose it.
- Create a Foil Collar: Just like with tunneling, wrap a foil collar around the candle. This time, its purpose is to create a small “oven” to re-melt the entire top surface.
- Light and Melt: Light the candle and let it burn until the entire top layer of wax, including the bottom of the sinkhole, melts into a complete liquid pool.
- Extinguish and Cool: Extinguish the flame and allow the candle to cool and re-solidify completely. The wax should now be a flat, even surface.
This method effectively answers, “how to fix a candle sinkhole with aluminum foil?” by leveraging the same heat-trapping principle.
How to Apply the Aluminium Foil Evenly for the Fix?
The question “How to fix uneven aluminum foil?” might imply difficulty in wrapping the foil perfectly for the tunneling fix. While the foil doesn’t need to be perfectly smooth or symmetrical, ensuring it’s applied correctly is key:
- Snug Fit: Make sure the foil fits snugly around the candle’s rim. This helps trap the heat effectively.
- Height Above Wax: The top edge of the foil should extend just slightly (about 0.5-1 inch) above the highest point of the unburnt wax. This creates the necessary “oven” effect.
- Opening for Flame: Critically, leave an opening at the very top for the flame to breathe. Don’t cover the entire top. You’re creating a collar or a partial dome, not a sealed container.
- No Contact with Flame: Ensure the foil doesn’t directly touch the flame. The heat from the flame will make the foil hot, which is part of the process, but direct contact could cause issues.
Preventing Tunneling in the Future
Once you’ve successfully used aluminium foil how to fix candle tunneling, you’ll want to prevent it from happening again. Good candle care is essential:
- The “First Burn” Rule is Golden: For the very first time you light a new candle, let it burn long enough for the entire top layer of wax to melt evenly to the edges of the container. This creates the candle’s “wax memory” for a wide, even melt pool. This can take 2-4 hours depending on the candle size.
- Burn for Proper Duration: After the first burn, always allow your candle to burn until the melt pool reaches the edges of the container each time you light it. Avoid short burns.
- Trim the Wick: Before every burn, trim your wick to about 1/4 inch. A trimmed wick creates a cleaner, more controlled flame, which helps prevent tunneling and reduces soot.
- Avoid Drafts: Burn your candles away from open windows, fans, or air conditioning vents, as drafts can cause uneven burning.
- Center the Wick: If the wick moves off-center while the wax is still liquid, gently nudge it back to the center using a non-flammable tool.
By following these simple candle care tips, you can enjoy your candles to the fullest, ensuring a clean, even burn every time.
Easy Foil Hack
Don’t let a tunneled candle dampen your spirits! With the ingenious application of aluminium foil, you now have a simple and effective method to fix candle tunneling and restore your candles to their former glory. Remember the key: trap the heat to melt the unburnt wax. By understanding how to fix candle tunneling with foil and implementing consistent candle care practices, you can enjoy longer-lasting candles with even burns and consistent fragrance. It’s a testament to how a common household item can solve a common household problem, ensuring you get the most out of every single burn.
How to Prevent Candle Tunneling in the Future
While aluminum foil is an excellent way to fix a tunneled candle, it is even better to prevent tunneling from happening in the first place. Follow these simple tips to maintain a perfect burn:
- Allow Enough Time for the First Burn: The first time you light a candle, let it burn for at least 1 hour for every 2.5 cm of jar diameter. For a 7.5 cm wide jar, burn the candle for at least 3 hours on its first use. This ensures the melt pool reaches the glass edges.
- Keep the Wick Trimmed: Keep your wick trimmed to a length of 6 mm before every single burn. A long wick can cause the flame to flicker wildly, which prevents even heat distribution.
- Avoid Drafty Areas: Place your burning candles away from open windows, ceiling fans, air conditioning vents, and high-traffic hallways. Drafts cause uneven burning and can lead to tunneling.
- Choose High-Quality Candles: Purchase candles with multiple wicks if the jar diameter is larger than 8 cm. Multi-wick candles distribute heat more evenly across wide wax surfaces.
FAQ About Fixing Candle Tunneling with Aluminium Foil
Here are answers to the most common questions about using aluminum foil to repair tunneled candles.
Is it safe to put aluminum foil on a burning candle?
Yes, it is highly safe if you follow standard safety precautions. Aluminum is non-combustible and has a melting point of approximately 660∘C. This is much higher than the temperature of a candle flame (which ranges from 400∘C to 600∘C in the outer zones).
However, you must always leave a large hole (d≥2 cm) at the top of the foil dome to allow hot exhaust gases and smoke to escape. Also, never leave a burning candle unattended, even when wrapped in foil.
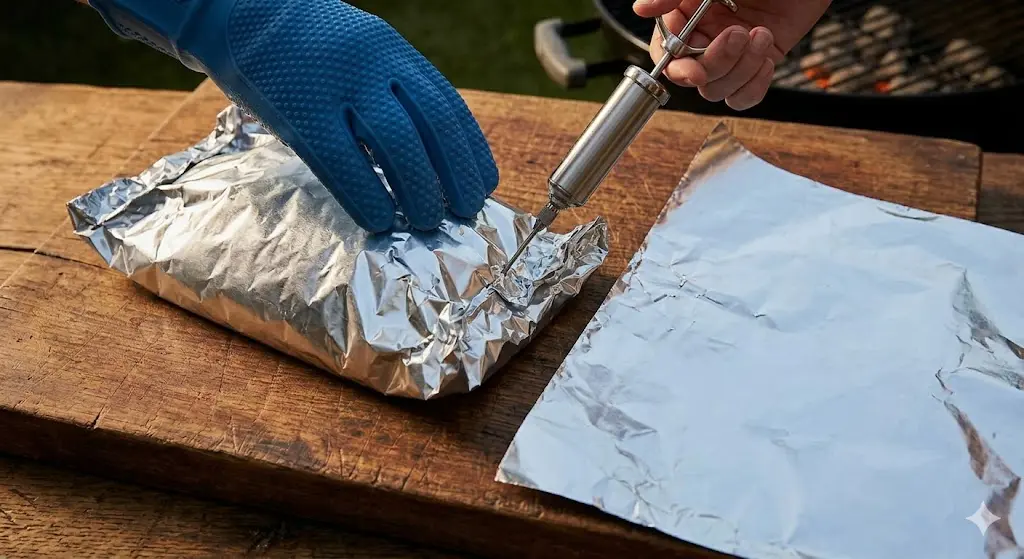
What should I do if the melted wax drowns the wick?
When the stubborn wax wall melts, it creates a large volume of liquid wax. If the tunnel was very deep, the rising liquid wax level may submerge and “drown” your wick, extinguishing the flame.
If this happens, extinguish the candle and use a paper towel or a plastic spoon to carefully soak up and remove some of the excess liquid wax. This will expose the wick again, allowing you to relight the candle safely.
Can I use the foil method on pillar candles?
Yes, you can use aluminum foil on free-standing pillar candles. However, you must be extremely careful.
As the outer wax ring of a pillar candle melts, there is no glass jar to contain the liquid wax. If the outer wall breaches, hot liquid wax will spill onto your table. Always place a pillar candle on a wide, heat-resistant ceramic plate or tray before applying the foil wrap.
Does the shiny side of the foil matter?
No, the shiny side does not make a significant difference for this household application.
Standard household foil has a shiny side and a matte side because of the manufacturing rolling process (two sheets are rolled together at the same time to prevent tearing). While the shiny side is technically slightly more reflective, both sides will reflect more than enough heat to melt your candle wax evenly.
How long does it take to fix a tunneled candle with foil?
The process typically takes between 30 minutes and 2 hours.
The exact time depends on the depth of the tunnel, the diameter of the jar, and the melting point of the wax. Paraffin candles in small jars melt very quickly, while beeswax candles in wide, thick glass jars take significantly longer.
Can I reuse the foil dome for other candles?
Yes, you can save and reuse the foil dome.
If you have multiple candles of the same size, simply lift the cool foil dome off your finished candle and store it. You can place it onto another tunneled candle whenever needed, saving material and reducing household waste.