Candle tunneling is a common issue for candle lovers. It happens when the wax around the edges of the candle doesn’t melt, forming a tunnel-like hole down the center. Fortunately, with a household item like aluminium foil, you can easily fix this problem and extend the life of your candle.
In this article, we will explain how to fix a tunneling candle using aluminum foil, how to correct a candle sinkhole, and answer other related questions using easy-to-follow steps and simple language.
Specification: Aluminium Foil for Candle Fixing
| Feature | Detail |
|---|---|
| Material | Food-grade aluminum foil |
| Thickness | 10–25 microns |
| Width | 30 cm / 45 cm (standard household) |
| Surface Finish | One shiny side, one dull side |
| Heat Resistance | Up to 660°C |
| Packaging | Roll or pre-cut sheet |
Classification: Common Candle Problems Aluminium Foil Can Fix
Aluminum foil can help with several common candle problems:
- Tunneling: Uneven wax melt that leaves a tunnel down the center.
- Sinkholes: Depressions that form around the wick after cooling.
- Uneven burn: One side melts faster than the other.
- Wax overflow control: Helps prevent wax from spilling.
How to Fix Tunneling with Aluminium Foil

Step-by-Step Method

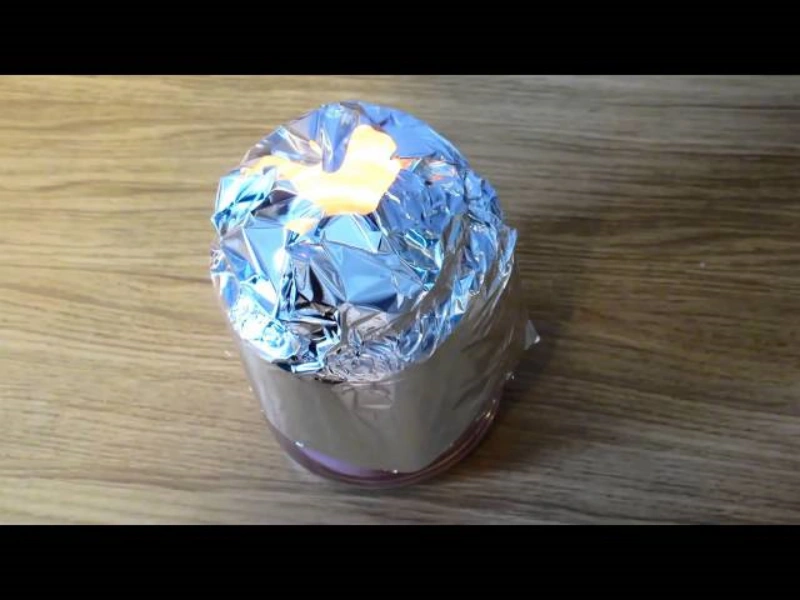
- Wrap the Candle
- Tear a 12-inch foil sheet and loosely cover the candle top.
- Leave a 1-inch opening above the wick for airflow.
- Create a Tent
- Fold edges inward to trap heat and melt outer wax.
- Ensure foil doesn’t touch the flame.
- Let It Burn
- Keep foil on for 1-2 hours until wax evens out.
- Remove foil and trim the wick.
- Prevent Future Tunneling
- First burn: Always burn until wax melts fully to edges (2-4 hours).
- Use a candle warmer for stubborn tunneling.
A Simple Guide to Restoring Your Favorite Candles
There’s nothing quite like the cozy glow and comforting scent of a burning candle. But sometimes, candles don’t burn perfectly. A common and frustrating problem is “candle tunneling,” where the wick burns down the center, leaving a thick ring of unburnt wax around the edges. This wastes wax, reduces the candle’s lifespan, and diminishes its scent throw. If you’ve ever wondered, “aluminium foil how to fix candle tunneling,” you’re in luck! This simple household item can be your best friend in reviving a tunneled candle. In this comprehensive guide, we’ll show you exactly how to fix candle tunneling with foil, turning your disappointing burn into a beautiful, even melt.
What is Candle Tunneling?
Before we dive into the fix, let’s understand the problem. Candle tunneling occurs when a candle’s wick burns straight down, creating a narrow “tunnel” in the center of the wax, leaving a significant amount of wax around the sides of the container untouched. This happens because:
- First Burn Syndrome (Wax Memory): The most common cause. Candles have a “wax memory.” On the very first burn, you need to let the candle burn long enough for the entire top layer of wax to melt evenly to the edges of the container. If you extinguish it before this happens, the candle will “remember” that smaller melt pool for future burns, leading to tunneling.
- Short Burn Times: Consistently burning a candle for short periods (less than 2-3 hours) also prevents the melt pool from reaching the edges, reinforcing the tunneling.
- Too Small a Wick: If the wick isn’t appropriately sized for the candle’s diameter, it won’t generate enough heat to melt the entire surface.
- Drafty Areas: Burning a candle in a drafty spot can cause one side to burn faster than the other, contributing to an uneven melt and eventual tunneling.
Tunneling isn’t just an aesthetic issue; it means you’re not getting the most out of your candle’s fragrance or its burn time, effectively wasting wax. That’s why knowing how to fix a tunneling candle with foil is such a valuable trick.
Why Aluminium Foil is the Solution
The reason aluminium foil works so effectively to fix candle tunneling lies in its ability to trap and reflect heat. When you wrap foil around the candle, you create a kind of “mini-oven” effect. The trapped heat melts the hard, unburnt wax on the sides, allowing it to join the main melt pool. This essentially “resets” the wax memory and allows the candle to burn evenly across its surface. It’s a surprisingly simple yet incredibly effective method to reverse candle tunneling.
How to Fix Candle Tunneling with Foil: Step-by-Step Guide
This method is straightforward and doesn’t require any special tools beyond a roll of aluminium foil. Here’s how to fix a tunneling candle with foil:
- Prepare Your Candle: Before you begin, make sure your candle is on a heat-safe surface. If the wick is very short or covered by wax, you might need to carefully expose it a bit. You can gently scrape away some wax around the wick to give it room to breathe, or if the wick is truly buried, use a lighter or a long match to try and melt a small amount of wax around it to get it started.
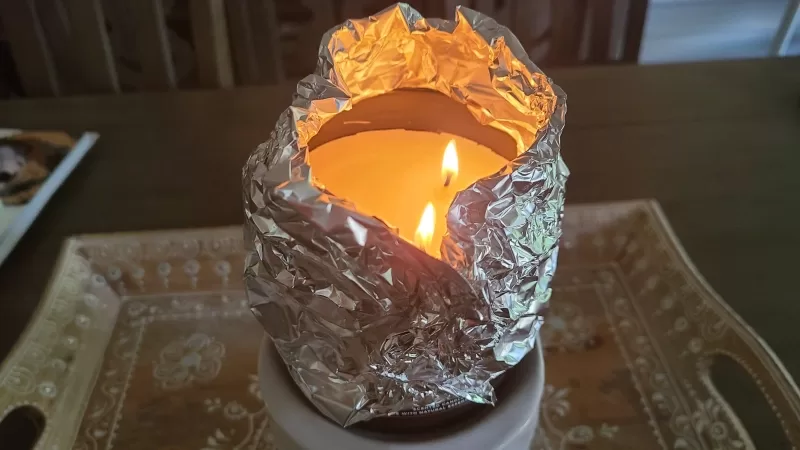
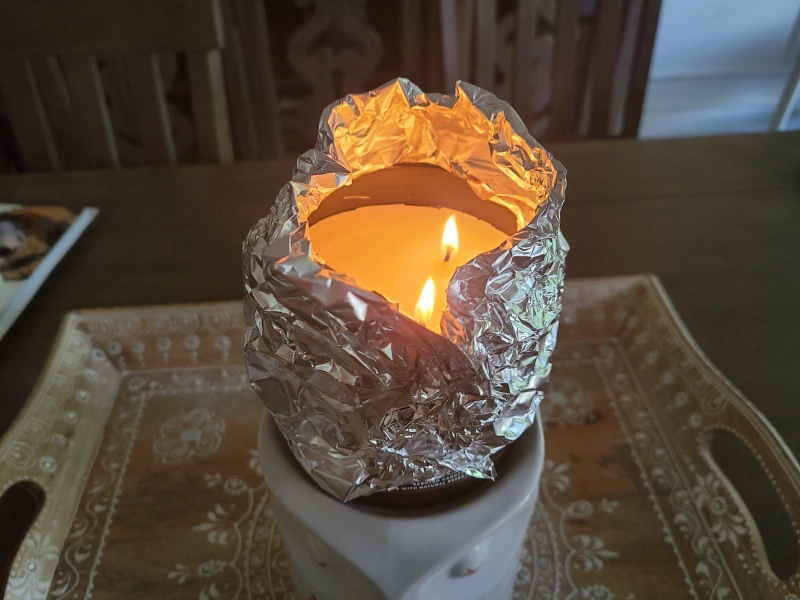
- Create the Foil Collar/Dome:
- Take a piece of aluminium foil large enough to wrap around the top of your candle.
- Fold the foil to create a collar that extends slightly above the height of the unburnt wax edges.
- Wrap this foil collar around the top rim of your candle, making sure it fits snugly but doesn’t completely block the flame from receiving air.
- You want to create a small “dome” or “tent” over the top of the candle, with an opening in the center for the flame to breathe. The key is that the foil should reflect the heat back inwards towards the edges of the wax.
- Light Your Candle: Light the candle’s wick as usual.
- Monitor the Melt Pool: Let the candle burn for a few hours. The heat trapped by the foil will slowly melt the built-up wax on the sides of the container. You’ll see the unburnt wax gradually melt down and join the main melt pool.
- Important: Keep an eye on the candle. The goal is for the entire top surface of the wax to become a liquid pool, reaching all the way to the edges of the container. This can take anywhere from 1 to 4 hours, depending on the size of the candle and how severe the tunneling is.
- Remove the Foil: Once the entire top layer of wax has melted to the edges, carefully extinguish the flame. Allow the candle to cool completely before removing the foil. The wax should now be level across the surface.
This process directly addresses the question, “how do you fix a tunneling candle with foil?” by creating the perfect environment for an even melt.
Can You Reverse Candle Tunneling?
Absolutely! As demonstrated by the aluminium foil method, you can reverse candle tunneling. The wax memory that caused the tunneling can be effectively “overwritten” by forcing an even, full melt pool. Once the wax has melted all the way to the edges and solidified flat, your candle’s “memory” will be reset. From that point on, if you follow good candle care practices (discussed below), your candle should continue to burn evenly. It’s a true salvage operation for your favorite scents!
How to Fix a Candle Sinkhole with Aluminum Foil?
While similar to tunneling, a “sinkhole” or “crater” in a candle often refers to a depression that forms after a full burn, typically due to air pockets or uneven cooling during manufacturing, or sometimes after an initial uneven burn. If you have a sinkhole, aluminium foil can also be helpful:
- Expose the Wick (if needed): If the sinkhole has swallowed the wick, gently dig around to expose it.
- Create a Foil Collar: Just like with tunneling, wrap a foil collar around the candle. This time, its purpose is to create a small “oven” to re-melt the entire top surface.
- Light and Melt: Light the candle and let it burn until the entire top layer of wax, including the bottom of the sinkhole, melts into a complete liquid pool.
- Extinguish and Cool: Extinguish the flame and allow the candle to cool and re-solidify completely. The wax should now be a flat, even surface.
This method effectively answers, “how to fix a candle sinkhole with aluminum foil?” by leveraging the same heat-trapping principle.
How to Apply the Aluminium Foil Evenly for the Fix?
The question “How to fix uneven aluminum foil?” might imply difficulty in wrapping the foil perfectly for the tunneling fix. While the foil doesn’t need to be perfectly smooth or symmetrical, ensuring it’s applied correctly is key:
- Snug Fit: Make sure the foil fits snugly around the candle’s rim. This helps trap the heat effectively.
- Height Above Wax: The top edge of the foil should extend just slightly (about 0.5-1 inch) above the highest point of the unburnt wax. This creates the necessary “oven” effect.
- Opening for Flame: Critically, leave an opening at the very top for the flame to breathe. Don’t cover the entire top. You’re creating a collar or a partial dome, not a sealed container.
- No Contact with Flame: Ensure the foil doesn’t directly touch the flame. The heat from the flame will make the foil hot, which is part of the process, but direct contact could cause issues.
Preventing Tunneling in the Future
Once you’ve successfully used aluminium foil how to fix candle tunneling, you’ll want to prevent it from happening again. Good candle care is essential:
- The “First Burn” Rule is Golden: For the very first time you light a new candle, let it burn long enough for the entire top layer of wax to melt evenly to the edges of the container. This creates the candle’s “wax memory” for a wide, even melt pool. This can take 2-4 hours depending on the candle size.
- Burn for Proper Duration: After the first burn, always allow your candle to burn until the melt pool reaches the edges of the container each time you light it. Avoid short burns.
- Trim the Wick: Before every burn, trim your wick to about 1/4 inch. A trimmed wick creates a cleaner, more controlled flame, which helps prevent tunneling and reduces soot.
- Avoid Drafts: Burn your candles away from open windows, fans, or air conditioning vents, as drafts can cause uneven burning.
- Center the Wick: If the wick moves off-center while the wax is still liquid, gently nudge it back to the center using a non-flammable tool.
By following these simple candle care tips, you can enjoy your candles to the fullest, ensuring a clean, even burn every time.
Conclusion
Don’t let a tunneled candle dampen your spirits! With the ingenious application of aluminium foil, you now have a simple and effective method to fix candle tunneling and restore your candles to their former glory. Remember the key: trap the heat to melt the unburnt wax. By understanding how to fix candle tunneling with foil and implementing consistent candle care practices, you can enjoy longer-lasting candles with even burns and consistent fragrance. It’s a testament to how a common household item can solve a common household problem, ensuring you get the most out of every single burn.